As most of you know, Nate and I are both landscape architects. When we found this house on the market, we both LOVED the idea that we were purchasing not only a home, but also a yard. The previous owner of this home was an avid gardener and had planted a vast array of plant species in the yard. When my sister first saw the place she commented that the yard was "overgrown" and I quickly stated that it wasn't overgrown, it was simply "overplanted". Nate and I set out on a mission to change it up, to make it our style, and to practice some of those things that we had learned throughout our career (and this time it was finally on our own home!).
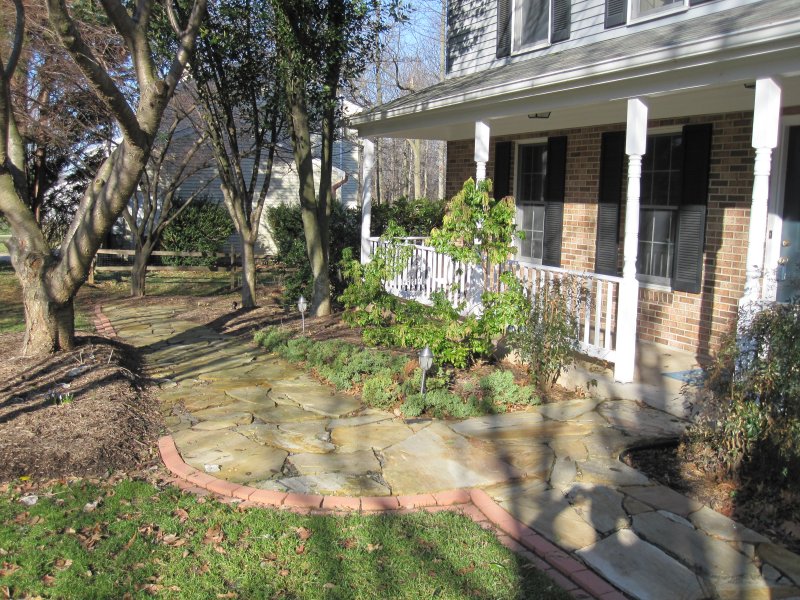
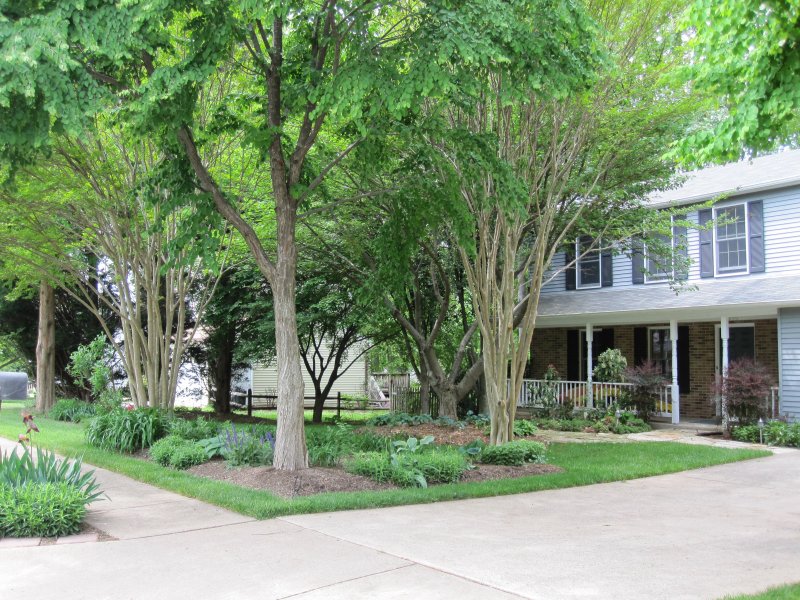
Below are some photographs of the yard before we moved in. There were two Crape Myrtles, two Katsura trees, one Japanese Maple, one Cherry, one Japanese Snowbell, one Dawn Redwood (which is my favorite tree!), one Dogwood, three Leyland Cypress and one Holly...all in our front yard!! By the way, we own a 1/4 acre lot, so our front yard is not that big. Talk about overplanted!!
 |
| ORIGINAL LANDSCAPE (EARLY SPRING 2010) |
 |
| ORIGINAL WALKWAY AND FRONT PORCH (EARLY SPRING 2010) |
 |
| ORIGINAL LANDSCAPE (EARLY SPRING 2010) |
 |
| CAN YOU EVEN SEE THE HOUSE? (LATE SPRING 2010) |
 |
| ORIGINAL LANDSCAPING (LATE SPRING 2010) |
 |
| ORIGINAL LANDSCAPING (LATE SPRING 2010) |
 |
| ORIGINAL LANDSCAPE (LATE SPRING 2010) |
 |
| ORIGINAL WALKWAY (LATE SPRING 2010) |
One of the first things that Nate and I did to create some curb appeal was to remove the original railing on the front porch and change out the porch columns.
 |
| ORIGINAL POSTS AND RAILING |
 |
| VIEW FROM FRONT DOOR OUT |
 |
| ORIGINAL FRONT PORCH |
We removed the railing in order to create a larger front porch area. We also decided to open things up by changing the arrangement and style of the porch post. We were creating a contemporary interior and wanted the exterior of the home to match. We removed the ornate traditional posts and replaced them with 6"x6" square posts.
 |
| RAILING REMOVED WITH NEW SQUARE POSTS |
We also removed the original gold address numbers and replaced them with satin nickel numbers. Nate also removed the outdoor light fixture in the ceiling of the porch and added recessed lighting for a more contemporary effect.
 |
| VIEW FROM THE STREET |
We liked the way that things were looking, but that Cherry tree (front and center in the above pic) was really hiding the entire house, not to mention making it really dark inside! So, we decided to take down the tree.
Now that the railing, the Cherry, and the front shrubs were removed, it was time to focus our attention on the front porch area. Nate took some marking paint and started to paint out an idea for enlarging the front porch.
 |
| CHERRY TREE REMAINDERS AND NEW PORCH LAYOUT! |
|
|
We hired a few of Nate's men and they began installing the flagstone on top of the original concrete slab at the front porch and extending it out to the paint lines that Nate had drawn out.
 |
| NEW FLAGSTONE FRONT PORCH |
 |
| EXTENDING OUT THE FRONT PORCH |
We also cut down a portion of the yard to make a "sunken lawn" and brought in some topsoil for the sod and the plants.
 |
| WORK IN PROGRESS AND MORE PAINT LINES! |
 |
| BOBCAT MOVING AROUND SOME DIRT. |
Once the yard was graded out, the work on the retaining walls began. We decided to use Pennsylvania flat stacked stone (the same that we used on our
fireplace) for all of our walls.
 |
| STOPPED DUE TO RAIN :( |
 |
| PROGRESS! |
Once the walls were completed, it was time to add the plants. We went with a fairly simple palette that consisted of plants like Boxwoods, 'Knock Out' Roses, Weigela, 'Miss Kim' Lilac, 'Otto Luyken' Laurels, and an array of new perennials and some existing perennials. We also ended up taking down the Holly on the corner of the house and replaced it with a beautiful limbed up 'Burford' Holly (the largest tree that we brought in). A Dogwood was also removed in addition to the Cherry to open things up.
 |
| NEW FRONT PORCH, WALKWAY, AND PLANTS! |
 |
| NEW FRONT LANDSCAPING (FRESHLY INSTALLED) |
 |
| WALKWAY AND BOULDER STEPS TO BACKYARD |
 |
| BOULDER STEPS LEADING THE LARGER FRONT PORCH |
 |
| FRONT PORCH WITH "STEPPABLE" PLANTS BETWEEN THE FLAGSTONE |
 |
| FRONT PORCH |
 |
| NEW MAILBOX AND MAILBOX PLANTINGS |
Ready for the Before and After?
|
| BEFORE |
|
| AFTER (IMMEDIATELY UPON COMPLETION) |
 |
| AFTER (AS OF TODAY) |
|
| PORCH BEFORE |
|
| PORCH AFTER |
Once the warmer Spring weather begins to roll in and we see where perennials begin popping up, we will probably infill as needed. This spring should show some improvement in the size of the plant material and by next Spring, this should be really filled in. Eventually, I want to paint the front door (I am thinking red) and the siding will need to be replaced (probably in a taupe color), and the shutters will need to be repainted black. But, that won't be happening anytime soon :)
The back yard also has yet to be done and it is in our sights for sometime this year!